Odometer Reprogramming - Nissan Sentra
Posted by Admin • Saturday, September 24. 2016 • Category: Automotive, Hardware HacksDisclaimer: It is perfectly legal to program an odometer to represent the correct mileage for the car.
Problem:
The car is a 2006 Nissan Sentra 1.8S. The instrument cluster is faulty and flips overdrive on and off at random. I ruled out the rest (switch, TCM). Thus, the cheapest option is to swap in another cluster, but that means that my mileage will be wrong. The replacement cluster I picked up on Ebay has 24K miles. Mine has 181K. Slight difference there.
Solution Summary:
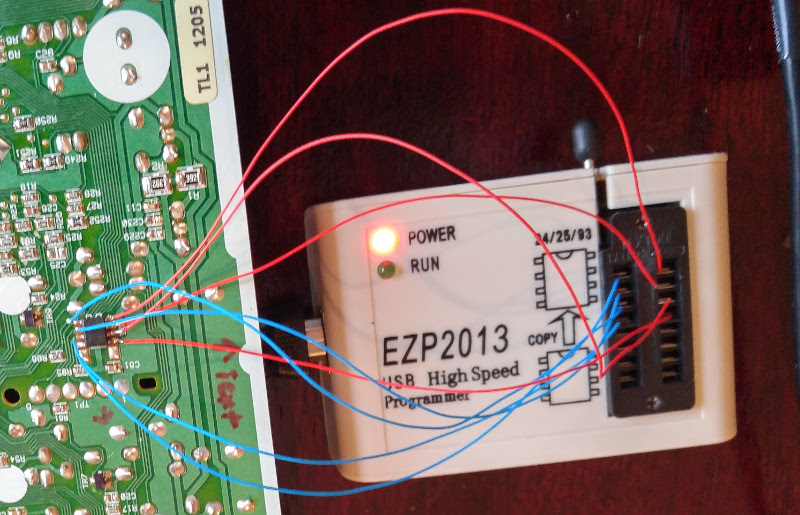
Use an EZP2013 IC programmer to read the memory from your old cluster and write that to the new one. Clearly this assumes that you are still in possession of your old cluster and that its EEPROM is intact.
Solution Detail:
The instrument cluster stores the odometer reading in an 8-pin IC with a very hard-to-read label which reads "S93C66" and some other symbols that are essentially illegible. No matter, 93C is the important part - it's a class of EEPROM chips. I'm not 100% sure what the manufacturer is, but most of them are compatible with each other. This datasheet is the closest visual match that I was able to find.
Now, technically you do not need a fancy programmer to work with this chip - you can make a circuit with some zeners and resistors if you want (and have the time) by following these instructions. That said, the ideal scenario is to have all the tools at hand:
Ideal Scenario
(plug in and reprogram)
- Replacement cluster
- Chip Programmer (Optional if you want to make your own circuit)
- In-system 8-pin SOP clip (Optional but would make life much easier)
- Computer supporting your chip programmer. For EZP2013, Windows 7 with a USB port. Windows 10 did not work
Less-than-ideal scenario
(temporarily solder wires and reprogram)
- Replacement cluster
- Chip Programmer (Optional if you want to make your own circuit)
- Some fine insulated wire (like wirewrap wire, 30awg or thinner) for soldering straight to the chip
- Soldering equipment (iron with a fine tip, flux, solder)
- Computer supporting your chip programmer. For EZP2013, Windows 7 with a USB port. Windows 10 did not work
Cowboy scenario
(swap chips altogether, no programming)
- Replacement cluster
- Soldering equipment (iron with a fine tip, flux, solder, desoldering supplies)
I'm only going to cover the less-than-ideal scenario, although the others should be obvious after that. Here are the steps:
Steps
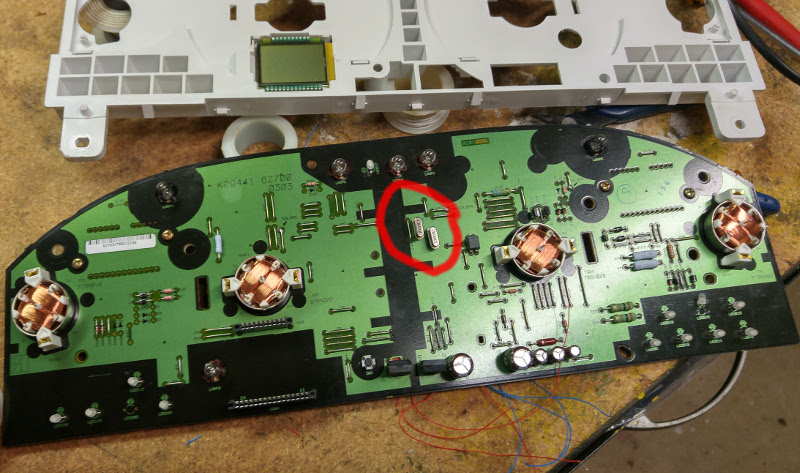
- Disassemble both clusters. On this car, only the black plastic back panel needs to be removed, the gauges and needles remain blissfully unaffected.
- Look for the IC in question by looking at the photos. Ideally confirm the chip model number
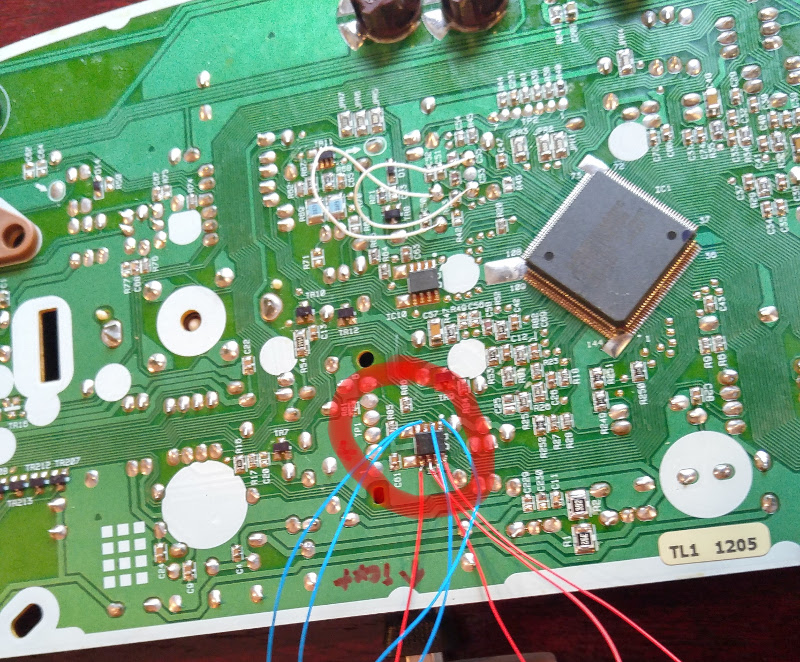
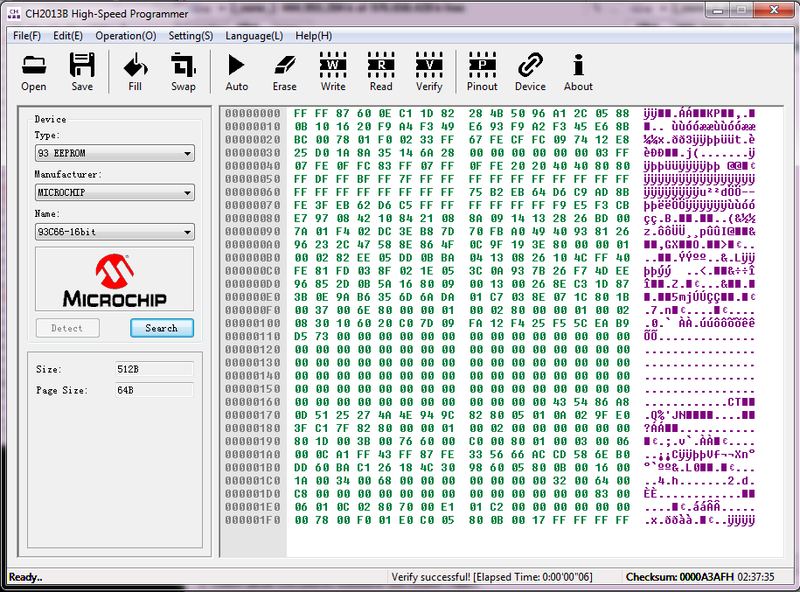
- Hook up to the chip. If you have the in-system clip, then you're pretty much done in a second. If not - then cut 8 pieces of wire (about 6" each), strip both ends and solder one end of each to each leg of the chip. Then do the same for the other cluster. Stick your wires into the receptacles on the programmer. This is the hard part - what's the pinout? The EZP2013 software gives you the pinout for the selected chip and where each pin should go in the programmer (click the Pinout button after selecting chip). For additional certainty, I verified the pinout in the datasheet (here is what I think is the right chip). See photos for how I wired it.
- Click Read. If you did everything right, you'll see some hexadecimal stuff that is clearly not all FF or 00. Click Read a few times and you'll notice it changes each time. This is bad. If you read that link to the Instructable, you may have missed the line that says "Short-circuit the Crystal". We have two crystals in this cluster, so I short-circuited both (see the two white wires in the photos).
- Now try to Read again. Hit Read a few times. In my case, the reading stabilized on the third click. If you wait a few seconds, the cycle repeats, so don't wait - click it fast. Save the last result to a file
- Switch clusters, repeat, get a stable Read result and save it also
- Write the bytes you read from the original cluster to the new cluster (load the file you saved then click Write). I had to do this 3 times fast just like the reads before it verified properly
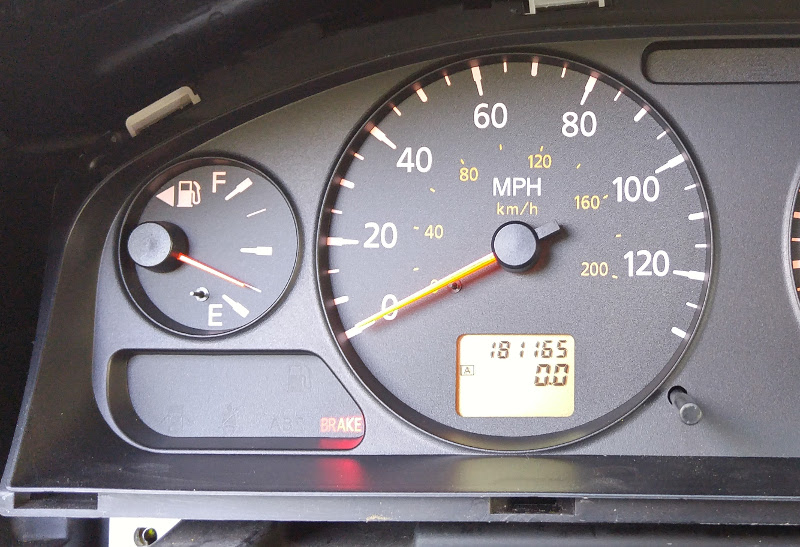
- You're done. Remove all your wires and see if it works. Interestingly, I got a reading 1 mile lower than the original cluster.


Discussion
You could probably figure out the algorithm for data storage. It is not the same as on the Toyota's as covered in the linked Instructable, since there is no repetition. You can compare your two saved files and you'll see that the differences are not very large, but they are somewhat spread out through the file. Since I have a working (and correct) original EEPROM, it is much easier to just copy it the way I did than to try to figure out what the data means.
Notes on gauge calibration
If you removed the gauge needles (which you shouldn't have to do for this job), you'll need to calibrate them. Without the "Consult-II" dealer-grade programmer, you'll have to do this manually. The four gauges are calibrated as follows:
- Fuel gauge: Drive until the fuel light comes on, then set the needle to empty or a hair above it.
- Speedometer: Use a GPS app that shows speed (or an OBD-II reader) and drive on cruise control on a level surface, then set the needle to the current speed. Yes, obviously this is dangerous, pick an empty road!
- Tachometer: Use an OBD-II reader (ie bluetooth interface + phone app) and set to the current reading when RPM's are steady. This may take you a few tries.
- Temp gauge: fully warm up, set in the middle
Good luck!

0 Comments
Add Comment